As you visit other churches for weddings or other reasons, you probably have noticed a number of different sound system designs. Some churches have column loudspeakers on the front walls. Another church will have many loudspeakers on the side walls. There are churches that have loudspeakers in the hanging light fixtures. Others have many loudspeakers mounted under the pews. It is apparent that there are many different approaches to providing a sound system. This article will explore the basic concepts of another design approach called the central cluster loudspeaker system.
First, what is a central cluster loudspeaker system? It is usually applied to a system where the loudspeaker or loudspeakers are placed close together. Then, the loudspeaker cluster is most often positioned above the platform in a central location. Hence, the name is a central cluster loudspeaker system. There are often slight changes in design and position, but the basic principles are the same.
Why would a sound system designer want to use a central cluster loudspeaker system? One reason is that a properly designed system can provide a room with very even coverage. This means the sound level (volume) will be very even from the first row to the back row and from side to side. In other words, no dead spots! Because the loudspeaker(s) are mounted high overhead, the difference in distance the sound travels to reach the back row or the front row is minimal (Figure 1). And with the proper loudspeaker selection and their positioning, even the differences in distance can be compensated for. However, the key to success is proper design. The designer must understand the coverage patterns of the loudspeakers and how to use them.
Another benefit of the central cluster is that it provides good localization. That means the amplified sound will appear to come from the talker. It is generally accepted that our ear/brains can locate positions side to side better than vertically. Therefore, when the amplified sound comes from an overhead loudspeaker system, we can more easily accept that the sound is coming from the talker. This provides a more natural listening environment.
The other major benefit of a well designed central cluster is its ability to provide sound with the least amount of interference between the loudspeakers. What this means is that a listener should only hear sound from one loudspeaker. If he hears sound from two loudspeakers and the loudspeakers are at different distances from the listener, the combined sound may be difficult to understand In fact, if the two loudspeakers are far enough apart, the listener may even hear two distinct sounds. The echo can really destroy intelligibility.
You may be asking why every sound system is not a central cluster type system. It would appear that it has many advantages. However, you should also have noticed the repeated phrase about a properly designed system. That is a most crucial point. A sound system must be designed for every unique worship space. What works in one church could sound terrible in another church. For instance, a central cluster will probably not work well in a church that has a very low ceiling and is also very long. A wide or fan shaped room often requires a different design approach. Another situation may be a church that has an extremely long reverberation time. Headphones might be the only way to achieve clear, understandable sound in that church.
We have all been in a church where the sound system was great. And unfortunately, the opposite situation occurs all too often. What’s the difference? Acoustics naturally play an important role. Even a church with the best acoustics can have a terrible sounding sound system. The sound system must be designed to fit both the specific individual room and the uses it will serve.
by Ron Huisinga
Monday, June 21, 2010
Loudspeakers: Why Do They Sound Different?
This simple question cannot be answered quite so simply. In order to better understand why loudspeakers sound different, we need a bit more information. There are different parts to the puzzle. Therefore, we need to look at each part in order to see the whole picture.
Different Listening Environments
If you have ever traveled with a music ministry team, you know that your sound system will sound different in almost every auditorium, sanctuary, fellowship hall and gymnasium that you encounter. Put the same sound system outdoors and a completely different sound occurs. What usually has the most impact on sound character is the acoustical nature of the room.
Let’s suppose I am a member of my church’s sound committee and we are searching for an updated sound system. During the investigative process, I attend a performance at the local high school auditorium and am impressed by the fact that one single loudspeaker can seemingly fill the room with natural sound at a good listening level. I then report at the next committee meeting that I have discovered the loudspeaker that will work “wonders” in our sanctuary. You know the rest…we buy the same loudspeaker and install it in our sanctuary only to find that we cannot understand a single word that is spoken. What went wrong?
We did not take into account how that particular loudspeaker interacts with our particular room. That one loudspeaker may have “filled” the room because it spreads out sound energy to a very large area. This would be acceptable if the room acoustics tend to be very dry, meaning low reverberation. However, putting that same loudspeaker in our worship space, which has a very large room volume, hard reflective walls, floor and ceiling, resulted in disaster. For our worship space, a loudspeaker that is more directional (controlling more of the sound energy to one defined area) would be required to keep sound from reflecting off the hard surfaces of the room. We need to keep more of the sound energy directed at the listening audience rather than at the ceiling.

"When a loudspeaker is hung in mid-air,
away from the ceiling, floor, and walls,
it will have the least amount
of bass response."
Same Loudspeaker in Different Locations in the Same Room
You may have experienced this at home after moving your stereo system loudspeakers to different locations in the same room. Perhaps you noticed a change in the low-frequency or bass response. To get the same tonal balance, you had to adjust the bass tone control up or down. This is due to an acoustical principle where room boundaries are involved. For example, when a loudspeaker is hung in mid-air, away from the ceiling, floor, and walls, it will have the least amount of bass response. This location is called free-space loading of the loudspeaker. Now move that same loudspeaker to the floor (one room boundary) and you will notice a 3 dB increase in bass response, which is a noticeable increase. This is called half-space loading. Now move that same loudspeaker to the middle of one wall and keep it on the floor. The loudspeaker is now at a point where two room boundaries meet (the wall and floor). You will hear another 3 dB in bass response, or 6 dB more bass response than the free-space location. This is due to the quarter-space loading. You can probably guess what happens when you move the loudspeaker to the corner where three room boundaries meet (floor and two walls OR ceiling and two walls). You will experience another 3 dB increase in bass response due to the eighth-space loading of the loudspeaker. The bass response at this location is now 9 dB louder than when the loudspeaker was hanging in free air . This is almost twice as loud at bass frequencies.
You may have also noticed a change in the overall sound quality when you moved the loudspeaker close to a hard reflective wall or ceiling. The reason for this is some of the mid-range and high-frequency sound energy is reflected off the wall or ceiling and back to the listener. The reflected sound arrives slightly after the direct sound. The combined sound energy results in a change in the overall tonal quality. Whether this reflected energy makes the loudspeaker sound better or worse is dependent on how far from the wall or ceiling the loudspeaker is located and the material composition of the wall. A hard, flat gypsum wall will reflect energy differently than a rough stone wall.
Loudspeakers Played at Different Loudness Levels
When comparing two different loudspeakers, you will want to listen to them at the same loudness levels. What is often overlooked is how the same loudspeaker will sound at different loudness levels.
One attribute of a well-designed sound system is its ability to maintain a natural, consistent quality when reproducing soft or loud sounds. Every loudspeaker will sound bad when turned up too loud (distortion) and some loudspeakers only sound good at certain loudness levels. These findings may not be relevant in a traditional liturgical service. However, turning up the sound system loud enough to be heard over a full congregation worshipping at the top of their lungs may cause the sound system to sound harsh.
Different Sound Sources
Listen to a well-recorded Mahler symphony on a pair of very expensive electrostatic loudspeakers. You may be impressed by the sonic experience. However, you may not be so impressed with those same loudspeakers when using them as the main loudspeakers in your sound system, reinforcing a large, contemporary worship team with a full complement of drums and electronic instruments. It is of utmost importance to plan for every conceivable type of sound source that you may encounter when considering loudspeakers for your facility.
Different Sound Operators

One other factor that will influence different sound quality is the sound system operator. For instance, if you have the same person mix and adjust the sound system for every event in your facility, chances are you will have very consistent sound from week to week and service to service. Having the same sound system operator, however, is very impractical for many churches. If you have more than one sound system operator, the sound system may sound different each time you have a service or event. Making certain that all of your operators are equally trained is one way to avoid this. An additional approach would be to assign one individual as a “producer” to provide constructive direction to the sound crew. This particular person does not have to be technically oriented. However, one needs to have good hearing and have a humble, servant-minded interest in how things sound.
Different Loudspeakers Designed for Different Purposes
Using a large, horn-loaded loudspeaker that was designed for an outdoor stadium in a small, intimate 200-seat chapel would be very unpleasant at best. The voices would sound harsh, and musical instruments, especially the piano, would sound strident and unnatural.
Loudspeakers that are designed to spread background music in every direction in a restaurant would probably produce howling feedback and indistinct speech in most worship spaces. Loudspeakers are complex mechanical de-vices. If design engineers make a decision on how to build a loudspeaker, they are usually trading one performance characteristic for another. When generating a lot of sound level in a specific direction outdoors is the primary objective, the engineer will consider the tonal balance and natural sounds reproduction of the loudspeaker to be of low priority. When the loudspeaker is designed for speech-only applications, such as paging and voice announcement, accurate music playback is not important in the design and manufacturing of the device.
Different Manufacturers’ Products
When a loudspeaker manufacturer begins to design a product, they often include input from sales representatives, dealers, key customers and end-users of similar products. When numerous people are involved with the development, the loudspeaker that is built will obviously sound different from the same type of product built by a different group of engineers and/or consulting team.
Different Electronics and Power Amplification
The quality of electronics and power amplifiers should be similar to the quality of the loudspeaker. While it is true that more attention and expenditure should be paid toward the loudspeakers and microphones in the sound system, a reasonable quality standard should be maintained for the system electronics and power amplifiers.
Some electronics are noisier than others. At higher levels, some electronics will distort sooner than others. Different power amplifiers will control low-frequency (bass) loudspeakers better than others. One certainly would not purchase a pair of $10,0000 studio monitor loudspeakers and power them with a $100 “build-it-yourself” kit amplifier. You would not want to skimp on loudspeaker cabling either. The gauge or size of the loudspeaker cable must be sufficient to transfer power and maintain control of the loudspeaker.
The Big Picture
Keep in mind that there is more to selecting a loudspeaker than reading a brochure, listening to loudspeakers at a retail store, or choosing a product on price alone. As you have seen, loudspeakers sound different for a variety of reasons. Make certain you find a contractor who knows all the pieces to the puzzle so you get the whole picture and nothing but the picture.
by Ron Huisinga
Thursday, June 17, 2010
The Basics of Live Sound
Mixing live sound is one of the most fun yet challenging aspects of music, and the ability to mix both in the studio and live makes a good audio engineer in high demand. Let's take a look at the basics of mixing live sound, and how you can be quickly on your way to learning to mix.
Getting Started
In most situations common for smaller bands, you'll be in a club with a less than stellar PA system. That's not to say you won't find a club that'll surprise you. In this article, we're going to be taking a look at mixing live sound from the angle of an aspiring engineer, not necessarily a band who's bringing their own PA system with them.

When you're faced with mixing sound, the first thing to take into account is the room itself. It's easy to overdo it; you really need to only reinforce what isn't easily heard in the room. When you're in a small room, amplifiers and drums are very easily heard naturally, especially in a very small space. Putting them through the PA will do nothing but make it sound messy in the room. One of the best pieces of advice I can give you is to keep it simple.
Mixing Vocals
The vocals are the most important part of any small-room mix. Making sure that they're loud and able to be heard clearly throughout the room is of utmost importance because they're no competition for loud guitar amps and drums. The biggest factor you're going to have to compete against is monitor feedback. Check out the guide to mixing monitors for information on killing feedback before it starts.

One technique I prefer to use is subgrouping. On a lot of boards, you'll have the option to group channels together to one fader, with the ability to insert a compressor across the whole group. This way, you can compress the vocals all at once (saving you valuable compressor room if you're limited in the number of comps you've got), and you can also double-bus - meaning, put the vocal in the subgroup as well as the channel itself - to get some extra gain.
Drums
Drums are a difficult thing to mix live. In order to deliver the best-sounding mix, you need to take stock of what you can hear in th room naturally, without amplification. Most drum kits, in a small room, won't need any amplification past the kick drum.
For a good small room, I prefer to mic the kick drum, as well as the snare. Toms generally don't need any amplification, as they're generally not played enough to warrant dedicated channels. If you're in a club that holds, say, between 250 and 500 people, you may need to mic them. If you're low on microphones, you can put one microphone for every two toms, placing them in between. Depending on the quality of the kit, you'll need to compress.

Overheads and cymbal microphones are of low priority. Even some small clubs that hold less than 1,000 people may not need amplification on the overheads. Sometimes, I'll mic the high-hat in a small room if the drummer plays it softly, but generally, it's not necessary.
I prefer to compress the kick drum separately, and EQ with a boost in the mid frequencies. I also, as usual with most channels, cut out everything below 80Hz.
Here's another tip: if you've got a loud snare, but still want to add reverb to it, you can switch the reverb send on that channel to pre-fader instead of post-fader. That way you can still send the snare signal to the reverb unit while not actually putting any in the house!
Bass & Guitars
Quite simply, in most small rooms, you won't need to mics the guitar amps and bass cabinets. In fact, I'm almost always finding myself having to ask the players to turn them down because they're too loud in the house. Sometimes you'll find you need more definition in the bass guitar, or your drummer will want more in their monitors. In this case, I'll put a DI box between the guitar itself and the amplifier. That way, you're in total control of the tone, and the amplifier on stage can still do its job as the player wishes.

Acoustic guitars are a different matter. Sometimes, you'll find players with an acoustic amp, but those generally don't cut through the mix well. Putting a DI box out for the acoustic is the best way to get the best sound; you'll need to carefully EQ it to avoid feedback. I always keep a Feedback Buster - a specially-designed round disk of rubber sold in most music stores - to lend to guitarists who don't have one. These block the majority of the frequencies from entering the guitar's soundhole, which prevents the major feedback problems you usually get.
In Closing
Mixing live sound isn't easy, but once you get the hang of it, you'll be doing fine. It's really a lot more than just riding faders and setting gain, though; don't be afraid to really dig into the more technical concepts like compression and EQ. You'll be a much better engineer for it. Of course, mixing in a large club is completely a different deal - you have much more flexibility and you're fighting less with the loudness of the instruments in the room. But for most situations, following these tips will give you the best sound possible!
Photos from "A Night of Extravagant Worship" June 4, 2010
Tuesday, June 15, 2010
A Symphony of Lights - "World's Largest Permanent Light and Sound Show"
A Symphony of Lights - "World's Largest Permanent Light and Sound Show"

This spectacular multimedia display, already named the "World's Largest Permanent Light and Sound Show" by Guinness World Records, has been further expanded to include more than 40 buildings on both sides of Victoria Harbour.
 The show creates an all-round vision of coloured lights, laser beams and searchlights performing a stunning, unforgettable spectacle synchronised to music and narration that celebrates the energy, spirit and diversity of Hong Kong.
There are five main themes — Awakening, Energy, Heritage, Partnership and the finale, Celebration.
For the best view of A Symphony of Lights, take a harbour cruise or head to the waterfront promenades on either side of Victoria Harbour*. The show, organised by the Tourism Commission, is a must-see event on any visit to Hong Kong.
This spectacular multimedia display, already named the "World's Largest Permanent Light and Sound Show" by Guinness World Records, has been further expanded to include more than 40 buildings on both sides of Victoria Harbour.
The show creates an all-round vision of coloured lights, laser beams and searchlights performing a stunning, unforgettable spectacle synchronised to music and narration that celebrates the energy, spirit and diversity of Hong Kong.There are five main themes — Awakening, Energy, Heritage, Partnership and the finale, Celebration.
For the best view of A Symphony of Lights, take a harbour cruise or head to the waterfront promenades on either side of Victoria Harbour*. The show, organised by the Tourism Commission, is a must-see event on any visit to Hong Kong.
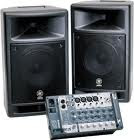
THE SOUNDCRAFT GUIDE TO MIXING
A. What does a Mixer do?
No matter how sophisticated or expensive, all mixers carry
out the same basic function - to blend and control the
volume of a number of input signals, add effects and
processing where required and route the resulting mix to
the appropriate destination, which could be power
amplifiers, the tracks of a recording device - or both. A
mixer is the nerve centre of these sources, and therefore the
most vital part of your audio system.
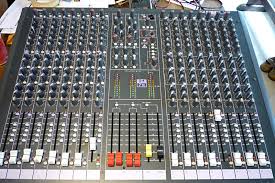
B. Guidelines in Choosing a Mixer
Audio mixers come in many different sizes and at all price
levels, so it’s little wonder that people are confused as to
what type is actually needed for the job in hand. However
there are several questions you can to ask yourself that will
help you narrow your search to the most appropriate
models.
• What am I going to be using the mixer for - i.e.
multitrack recording, live PA work or both?
• What is my budget?
• How many sound sources do I have? As a guideline your
mixer needs to have at least as many inputs as sound
sources. If you are likely to be buying more equipment in
the future you should budget for extra inputs.
• What particular mixer facilities must I have for my
application? i.e. plenty of EQ, auxiliaries, or Direct Outs
for recording.
• How portable does the mixer need to be?
• Will I be doing any location work where there won’t be
any mains power available?
• Have I read the Soundcraft Guide to Mixing from cover
to cover?
Once you can answer these questions satisfactorily you
should have a fairly accurate specification for the mixer you
need.
No matter how sophisticated or expensive, all mixers carry
out the same basic function - to blend and control the
volume of a number of input signals, add effects and
processing where required and route the resulting mix to
the appropriate destination, which could be power
amplifiers, the tracks of a recording device - or both. A
mixer is the nerve centre of these sources, and therefore the
most vital part of your audio system.
B. Guidelines in Choosing a Mixer
Audio mixers come in many different sizes and at all price
levels, so it’s little wonder that people are confused as to
what type is actually needed for the job in hand. However
there are several questions you can to ask yourself that will
help you narrow your search to the most appropriate
models.
• What am I going to be using the mixer for - i.e.
multitrack recording, live PA work or both?
• What is my budget?
• How many sound sources do I have? As a guideline your
mixer needs to have at least as many inputs as sound
sources. If you are likely to be buying more equipment in
the future you should budget for extra inputs.
• What particular mixer facilities must I have for my
application? i.e. plenty of EQ, auxiliaries, or Direct Outs
for recording.
• How portable does the mixer need to be?
• Will I be doing any location work where there won’t be
any mains power available?
• Have I read the Soundcraft Guide to Mixing from cover
to cover?
Once you can answer these questions satisfactorily you
should have a fairly accurate specification for the mixer you
need.
Monday, June 14, 2010
RECORDING ACOUSTIC GUITAR
Recording Acoustic Guitar
by:Michael Laskow
While the acoustic guitar remains one of the most simple instruments by design, it also remains one of the hardest to get a great sound on in the studio. It's really not brain surgery, but knowing some of the basic laws of physics doesn't hurt. Unfortunately, I skipped school that day and didn't learn my physics, so I had to learn how to get a great acoustic guitar sound one mistake at a time. After making those mistakes, I sat down and formulated these laws which are considered to be the Ten Commandments of recording the acoustic guitar (by me anyway).
For the sake of argument I'm going to assume that if you're reading this, you own a 4 track, or an 8 track recorder, a fairly small console, some basic outboard equipment, and you don't own any $2,000 microphones. If you own 13 foot long console and a 48 track digital machine, you can skip this article because you probably know what I'm about to tell you.
Rule 1 • A condenser mic will almost always sound better than a dynamic mic for acoustic guitars. There are several condensor mics that are currently on the market in the $350 price range that sound great on acoustics.
Rule 2 • New strings will always sound better for recording than old.
Rule 3 • Skinny strings sound brighter than fat ones (can you believe I get paid to write crap like this?!)
Rule 4 • The sound you get has a great deal to do with the dynamics of the player.
Rule 5 • Get down on your knees and position your ear as if it were the microphone while somebody else is playing the guitar. Move your ear around to find "sweet spots". You'll learn more from that, than you will by reading this article. Don't try it with an electric guitar!
Rule 6 • If you have somebody that is assisting you on the session, have them move the mic around what you think will be the sweet spot while the player is practicing the part he or she is about to lay down. Have your assistant wear headphones so you can communicate with him while the moving of the mic is taking place.
Rule 7 • A limiter/compressor will almost always help you get a better sound.
Rule 8 • Don't believe everything you read. I only have seven commandments, not ten.
Let's get right to it. If the sound you want to get is a country/pop, strummed sound similar to the Eagles "Lyin' Eyes", here's the formula: Place the microphone about 6 to 8 inches from the guitar's sound hole, but angle the mic toward the area where the fretboard and the sound hole meet. If you point the mic directly into the sound hole, it will be very full -- probably much too full, and very boomy. Use a compressor/limiter to knock down any peaks (3:1 ratio), and set the threshold a little lower to give it a slightly "squashed" or tighter sound. Set the threshold higher to just limit the peaks and give a more open sound. You may need to EQ out some boominess. If so, try rolling off some bottom (100Hz), or cutting a couple of db at 300Hz. To add some "silk" on the top end, try something in the 8-10K range, but be careful, to much will add noise to the track. Positioning the mic so it angles toward the pick will give more attack-less sweetness.
For that John Cougar Mellenkamp sound, try medium gauge strings, a little more compression, and try adding a little EQ around the mids -- lets say 700Hz-1.2K. That will give you a sound that is a little more "woodsy" (a highly technical term).
"Ya, well what about Melissa Ethridge," you say. Try this on for size. Use a guitar with a built-in pick up and a microphone to boot. You will undoubtedly get some phase anomalies, but that's part of the sound. Experiment with moving the mic closer and farther. That will affect the phase relationship of the two sound sources. Sooner or later, you'll hit on something that will put a smile on your face. You can pan the two signals left and right to get a broad stereo sound, but make sure that if you check the sound in mono, that there's still some signal left. Keep an eagle ear on Mr. Phase, he can be a tricky bugger.
And now ladies and gentlemen, for the most often heard acoustic guitar sound at the 1993 Grammys . . . it's that Eric Clapton classical/gut string guitar! Piece of cake. Once again, use a condensor mic, but place it about ten inches away from the guitar. As a matter of fact, try placing it about 3 to 4 inches up the neck, but aim it at the players picking fingers. This angle will reduce boominess by virtue of the mic's cardioid polar pattern producing a natural roll off when it's aimed off-axis, while simultaneously delivering the attack of the fingers. Try and say that three times in a row! The added distance will pick up some of the guitar body's resonance. A compressor/limiter is a must for this case because of unexpected peaks. A 4:1 ratio is a good place to start, but set the threshold fairly high so that the most of the guitar's natural dynamics are left in tact.
When mixing acoustics guitars for rock or alternative tracks, you will usually have an electric guitar or two in the track as well. My personal preference is to pan the acoustic and electric across from each other. Send one full left, and the other full right. You'll quickly discover that the electric will overpower the acoustic and the most effective way to even them out is to compress the acoustic a little bit more than what you may have already done going to tape so you can bring the acoustic's level up high enough to compete with the electric.
Another simple but effective trick is to have the acoustic and electric guitars play parts that counter each other rhythmically (giving them each their own space), and have them each play in a different octave. That will give you a full sounding track that remains open and airy at the same time. You can also make an acoustic guitar sound bigger or more rock-like by panning the original to one side and a delayed signal (short delays are best) of the same guitar to the other side. That effect can be taken one step further by using the pitch change option on your delay to "de-tune" one of the guitars just a pinch (one cent is a good place to start). The delay will provide the brain with the psychoacoustic information it needs to perceive the guitar as bigger, while the pitch change will make it appear "fatter."
Funny how fatter is always better in the world of recording, but not in the case of the human body. Just a tangential observation . . . must be time to go.
****During Michael Laskow's 20-year tenure as an engineer/producer, he worked with Crosby, Stills, Nash and Young, Eric Clapton, Cheap Trick and countless others. He continues to write articles for magazines like Recording and Electronic Musician. He's also the founder of TAXI, an independent A&R company that links record labels with unsigned artists and songwriters.
Sunday, June 13, 2010
VOCAL RECORDING

Vocals are generally considered to be the most important part of a mix. It's the vocals that will be remembered for good or for worse, so here are a few tips for making a hit vocal recording:
Room choice
The room is important: Recording studios pay big money to acoustically treat rooms. Some rooms will be treated to sound "dead" (or non-reflective). Some rooms are designed to have a big "live" sound, but are treated so that the reflections in the room help the music rather than hurt it. Basically, when sound waves reflect off surfaces, it can can make or break your recording. For most vocal recording, you want a DEAD studio space.
Why dead?
An acoustically 'dead' environment for vocals provides the engineer with more control over the sound when mixing. The more pure the sound, without room sound, the better she/he can paint a picture. If you record vocals in the shower room the sound of the vocals will always have that open 'live' sound. You can't get rid of this later. We want to be able to add the reverb artificially by using our lovely reverb unit.
Not a rule
Of course sometimes you can break the rules and use a particular acoustic space for an effect. Like recording the sound of a choir in a cathedral, you do want the acoustic room sound then. But generally speaking for POP vocals you want a 'dead' room so the vocals can then be produced.
I don't have an acoustically dead space for vocals
I personally own and use the VTB-100 Portable Vocal tracking Booth which does its job well. The Realtraps Tri-Corner Vocal Booth is also a useful product and a little more affordable. Agreed you might not have the luxury or an open checkbook but you can use your imagination. Drapes, blankets, foam, and fiberglass can all be helpful. Use your imagination.
Microphone choice
So if you are making a record forget about using anything other than a capacitor microphone or at least a VERY good dynamic mic. A capacitor mic is a mic that needs power either from a battery or phantom power ( 48vdc) which good desks have. You might see vocalists using a sure SM58 (because they are rugged) on stage but forget about that in a studio as their frequency response will not get the lovely bits you want for stunning clear vocals. I'm not going to rant about this mic or that mic but something like the ADK TC will sound very good.
Mic pickup patterns
Ever heard of this one? Well this is how the microphone picks up sounds form all directions. Some mics will pick up sound only if you sing directly into them some will pick up sounds from behind them. Mics have what's known as a polar pattern. Imagine a clock face and 12 o'clock is 0 degrees. 6 o'clock is 180 degrees. Some mics pick up well at 180 degrees others don't.
There are names associated with pick-up patterns such as:
UNI-DIRECTIONAL (Cardioid or HyperCardiod)
OMNI-DIRECTIONAL (Omni)
BI-DIRECTONAL (or Figure of 8)
I'll cut a very long story short here for the benefit of this paper and point out that uni-directional (meaning one-way) will be a good choice because you'll only pick up the sound from 0 degrees (12 o'clock). This will help if you are recording with the shower room effect, as the reflected sound will not be picked up so much. If you use an omni-directional pattern all the reflections will be picked up which is BAD, unless your room sounds amazing (but most bedrooms and garages do not tend to improve sound).
Pop Filter
A pop filter (or pop shield) helps reduce blasts and pops when singing or speaking the P and B sounds. These blasts and pops are known as plosives. The pop filter also helps protect your expensive condenser microphone from moisture which protrudes from the mouth of excited singers.
Over to the vocalist
Trained vocalists are good at mic technique. This means they move to and from the mic to help with the dynamics of a performance. In-experienced vocalists are not great at this and they tend to stick the mic in the mouth and try to eat it, especially rap artists. Which is fine but hard work for you! So try to educate them so as to get a better sound by not munching the mic. If they insist you might have to use a limiter.
Limiter
A limiter it basically a compressor turned up full at a particular threshold. This means that when the vocal reaches a certain level the limiter will not allow it to go above that limit. This is really very good for controlling the mic munching problem. In fact limiters are used a great deal in live work. So if Alice Cooper slams his mic into the drummers head, the PA will not blow a driver as the level is limited. This is very useful for tricky performers. They can shout as much as they like but it wont go any louder man!
Headphone mix
You want to have the vocalist really 'get-off' on the headphone mix. Happy performers sound better than irritated ones. Give them what they want by saving the killer vocal takes for when the song is nearing completion. You know if the song is really 'kicking in the cans' the vocalist will get into it. Don't loose sight that it's a performing art, if heavy laced with science. Also note that as you are creating a headphone mix you have a great deal of power in couching the performance. Shall I add more reverb? Is it too flat? How can I get the performance angry? Very interesting area and very underrated job!
Compression
I usually apply a little compression at the recording stage and then more at the mixing stage. Some guys don't record with it. Some do. Experiment with this but remember you can't get rid of it once you have recorded it. When mixing I'll use compression to bring out the breaths and fatten up the sound, and I love multi-band compression.
Aural enhancement.
These boxes add extra harmonic content making the sound have more 'top end' and clarity. You have to careful though as too much top end can sound nasty on the s and t sounds. You might have to use a de-esser (compression at a specific frequency band), which will reduce the level of the troublesome frequencies. Personally, I often track vocals through the Empirical Labs FATSO, which is a compressor with adjustable tape emulation which adds harmonic "warmth" and actually doubles as an effective de-esser.
Turn them up.
Don't forget to turn them up in the mix. And if the tune is for a radio mix we turn the lead vocals up by between 3 to 6 dB. That can be twice as loud! Listen for yourself to an album version then a radio version.
That's all for now.
Subscribe to:
Posts (Atom)